


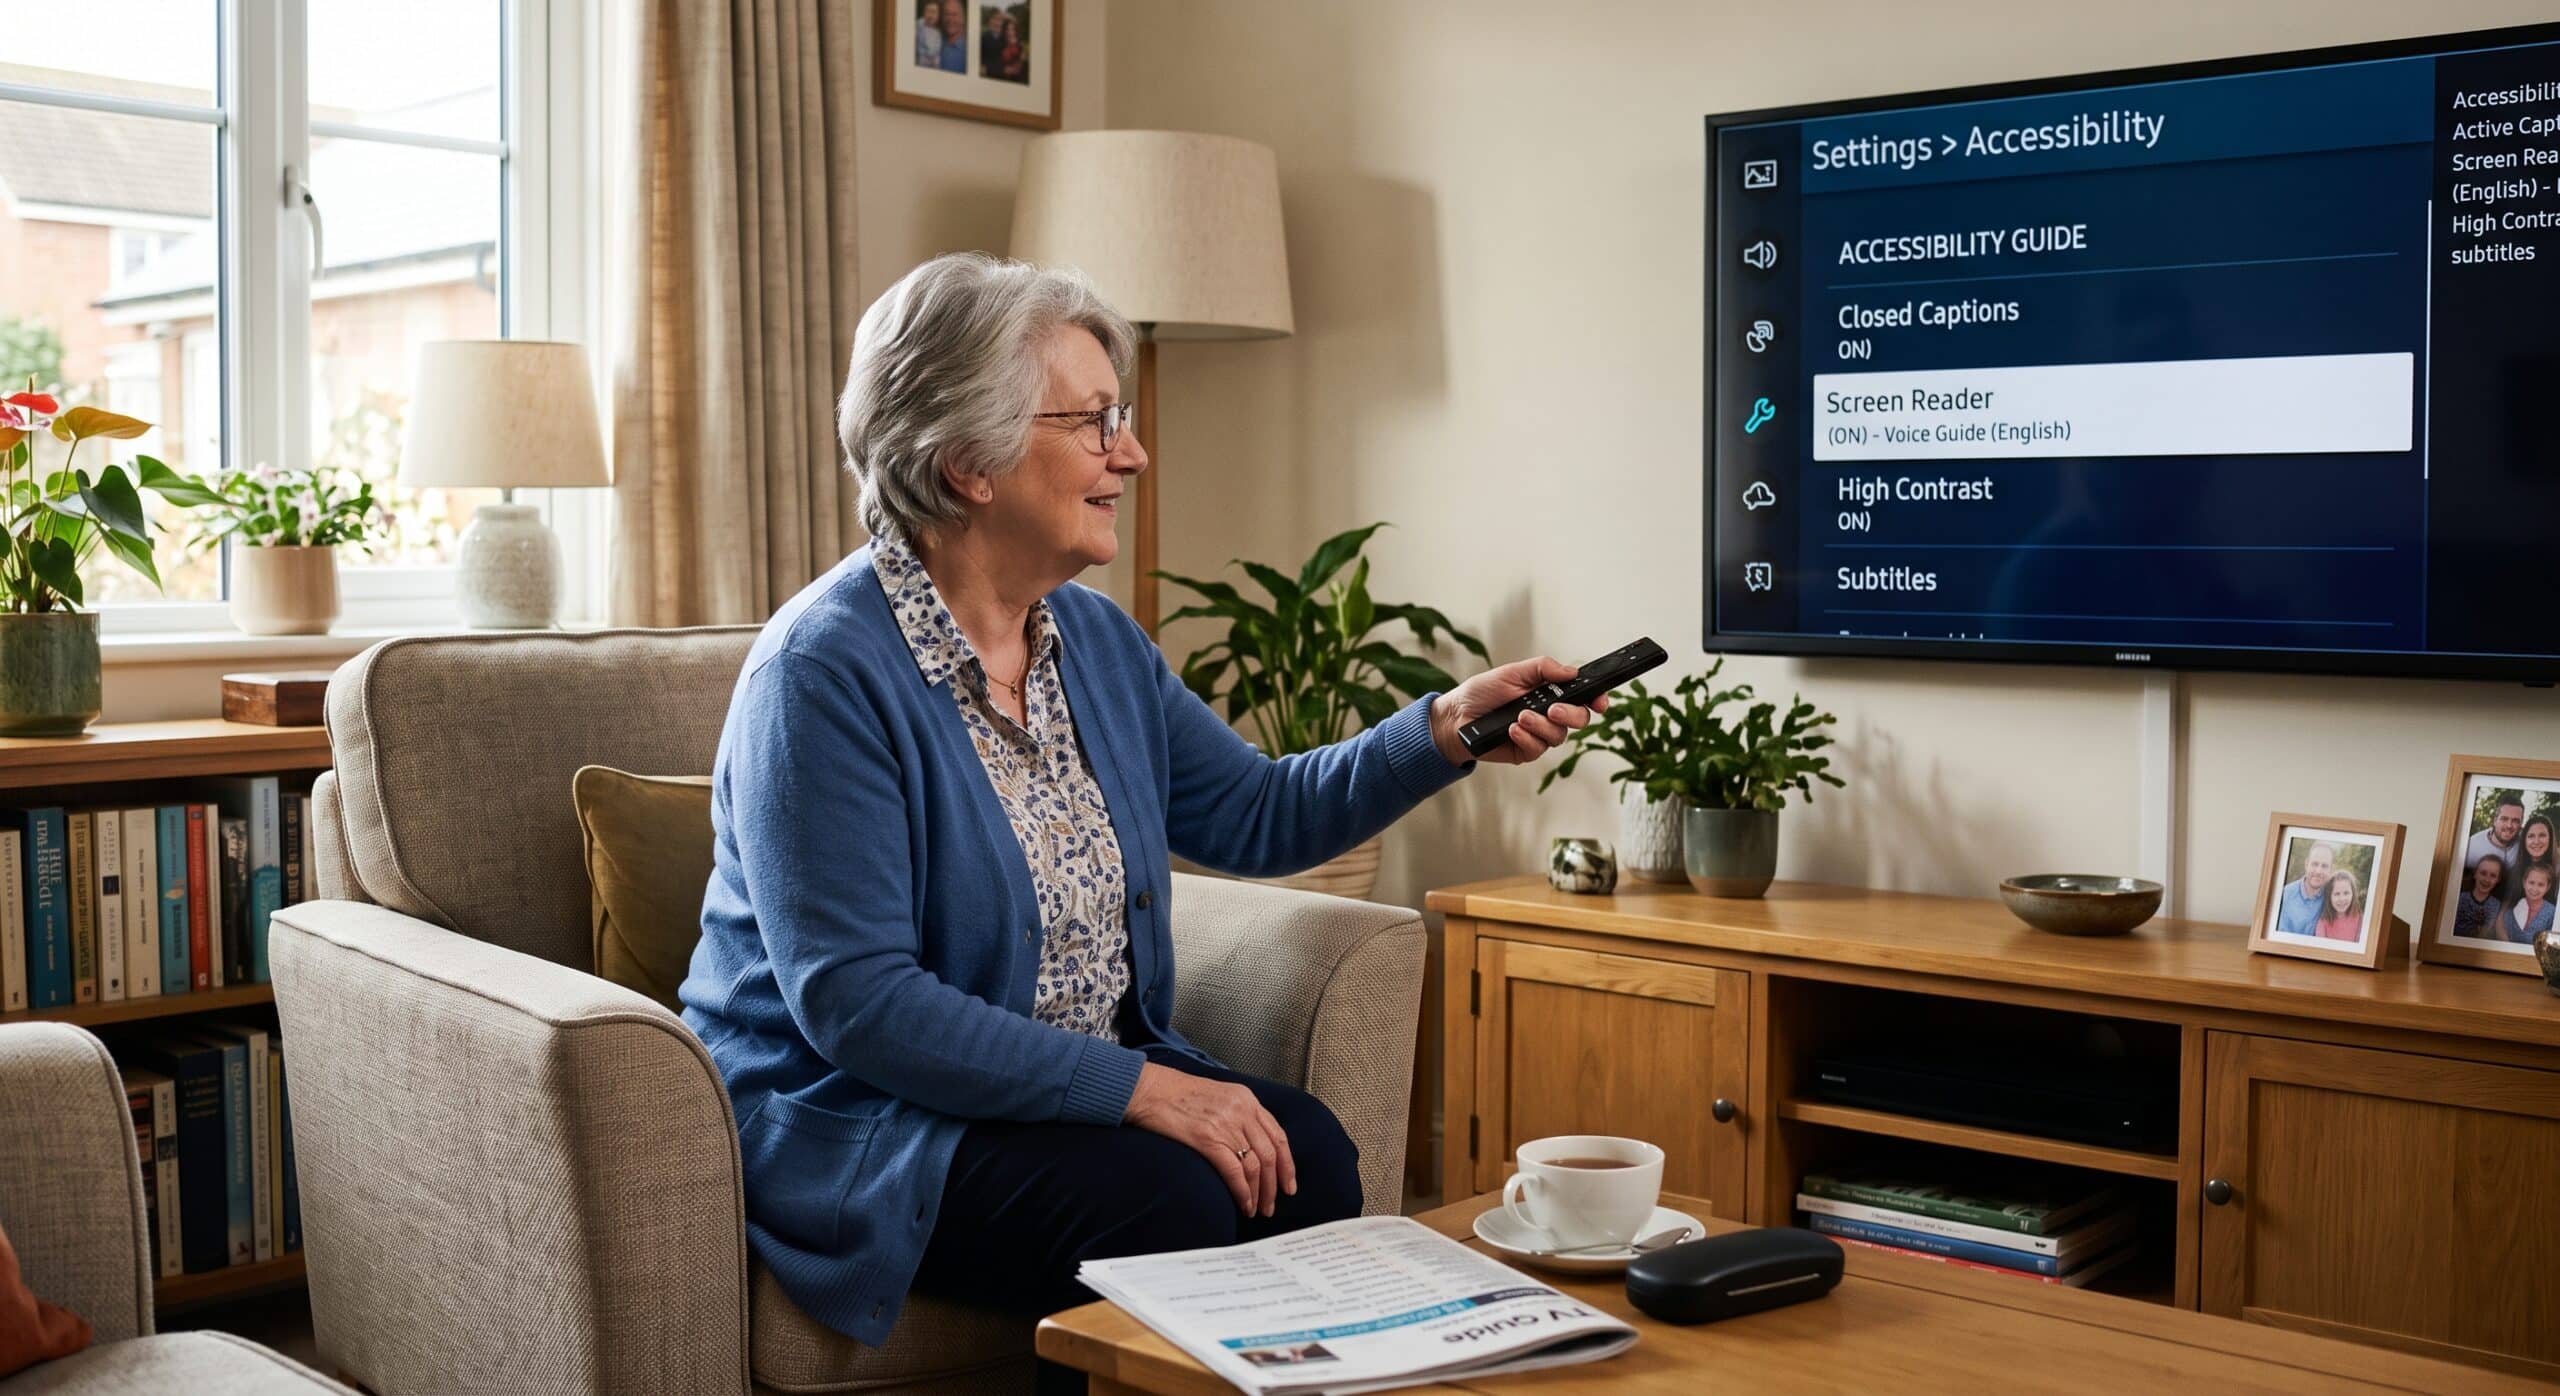
Modern televisions no longer limit users to basic picture, sound, and channel controls. Furthermore, manufacturers now equip many models with built-in tools that make menus easier to understand, dialogue easier to follow, and remote controls simpler to operate. The most useful Smart TV accessibility features include screen readers, closed captions, audio descriptions, high-contrast settings, magnification, voice control, and simplified navigation.
However, exact setting names and menu paths vary among Samsung, LG, Sony, Roku, Google TV, Fire TV, and other platforms. Consequently, users follow a similar setup process across systems: open Settings, choose Accessibility, and select the specific feature to adjust. This guide explains how these tools work, how users can customize them, and how to create a more comfortable viewing experience.
Before You Begin
Before changing your settings, ensure you connect your television to the internet and install the latest available software. After all, software updates improve Smart TV accessibility features and resolve bugs with captions, voice guidance, or remote control functions. Keep the television remote nearby during setup. For example, some models feature a physical shortcut that opens accessibility settings when you hold a button down for several seconds, while others allow users to access features through voice commands or a connected mobile app.
Manufacturers place accessibility menus under various headings:
- Accessibility
- General and Accessibility
- System and Accessibility
- Device Preferences and Accessibility
- Audio or Caption Settings
- Ease of Access
Additionally, connected devices—such as a Roku player, Apple TV, Fire TV Stick, cable box, or streaming application—may offer accessibility options if the television lacks them. However, remember that accessibility settings on an external streaming device do not automatically override or control the settings on your television.
1. How to Turn On and Customize the Screen Reader
A screen reader speaks the text, buttons, menus, channel information, and program details displayed on the screen. Therefore, this tool supports viewers who are blind or have limited vision. Manufacturers use different names for similar tools. For instance, Samsung calls its feature Voice Guide, whereas LG uses Audio Guidance, Google TV and Android TV use TalkBack, Roku uses Screen Reader or Audio Guide, and Apple TV uses VoiceOver.
General Setup Steps
- Press the Home or Menu button on the remote.
- Open Settings.
- Select Accessibility.
- Choose Screen Reader, Voice Guide, Audio Guidance, TalkBack, or the equivalent option.
- Switch the feature on.
- Move through the menus to confirm that the television reads each item aloud.
Moreover, Google’s Android TV places TalkBack under Settings > Device Preferences > Accessibility. This same menu contains caption and audio-description controls, although the available choices depend on your television model and software version.
Customizing Spoken Guidance
After enabling the screen reader, adjust key voice options:
- Speech speed
- Voice volume
- Voice pitch
- Verbosity or level of detail
- Program description readouts
- Button feedback sounds
- Spoken channel changes and volume adjustments
Specifically, a slower speech rate helps new users learn the interface, while a faster rate allows experienced users to navigate quickly. Likewise, increase the voice volume for clear hearing, but avoid setting it so high that it masks program dialogue. In addition, some televisions read every screen element in full detail, whereas others announce only the highlighted item. Thus, if the screen reader becomes overwhelming, simply reduce the speech detail or disable nonessential audio cues.
Using Shortcuts Carefully
Shortcuts help when multiple viewers share the television. For example, a dedicated accessibility button or a press-and-hold command toggles voice guidance on or off without forcing you to navigate visual menus. However, users can activate shortcuts accidentally. If the screen reader suddenly begins speaking, press the shortcut again or navigate to Settings > Accessibility to turn it off. Furthermore, if a family member assists with setup, ask them to demonstrate which button toggles the feature.
2. How to Enable and Customize Closed Captions
Closed captions display spoken dialogue and important sound effects as on-screen text. As a result, they assist viewers who are deaf or hard of hearing, individuals watching TV in noisy rooms, and anyone who struggles with unclear audio. Users manage captions through two primary locations:
- The television’s main accessibility menu.
- The individual streaming service or external playback device.
However, turning captions on within the television’s system menu does not always activate them inside every third-party app. Therefore, if captions fail to appear, open the playback controls inside the specific app and select the CC icon, speech-bubble icon, or subtitle menu.
General Setup Steps
- Open Settings.
- Choose Accessibility or Captions.
- Turn on Closed Captions.
- Select a preferred caption language.
- Choose a preset style or customize the text appearance.
For example, Google TV provides caption controls under Device Preferences > Accessibility > Captions, where users select sources and adjust text presentation.
Improving Caption Readability
To maximize readability, adjust specific text formatting controls:
- Text size and font style
- Text color and background color
- Background opacity and edge style
- Window size and screen position
Generally, medium or large text improves legibility from a distance, while white text on a solid black background creates strong contrast against most video scenes. If a solid background blocks too much picture content, select a semi-transparent background instead.
In contrast, avoid yellow text on a white background or light-gray text over bright scenes. Color alone does not guarantee readability; therefore, dark background blocks or distinct text outlines offer reliable visibility. Furthermore, advanced caption engines display non-speech audio cues such as [doorbell] or [music playing], providing essential context beyond spoken lines.
Fixing Delayed Captions
Broadcast signals, streaming application errors, network congestion, or external devices can desync caption timing. If timing lags occur, pause and restart the video, re-launch the application, or test a different program to isolate the issue. Consequently, if captions sync correctly in one app but lag in another, the issue stems from that specific application rather than your television. In that situation, review the app’s internal subtitle settings and install available app updates.
3. How to Activate and Adjust Audio Descriptions
Audio description inserts a spoken narrative that details key visual events not conveyed through dialogue alone. For instance, the narrator explains character entries, physical actions, scene changes, facial expressions, or on-screen text. Although producers create this feature primarily for blind or low-vision viewers, it also aids multitaskers who cannot watch the screen continuously.
Turning On Audio Description
Depending on the manufacturer, system menus label this option as Audio Description, Video Description, Descriptive Audio, Spoken Description, or AD.
- Open Settings.
- Go to Accessibility or Audio.
- Select Audio Description or Video Description.
- Toggle the feature on.
- Play content that includes a descriptive audio track.
- Adjust the narration volume balance if available.
For example, Samsung places Video Description under Home > Settings > General > Accessibility on supported models, and includes a dedicated remote shortcut on select devices. However, audio description availability depends on content providers; thus, enabling the feature in settings does not force silent shows to generate narration. If you hear no narration, open the active video’s audio-language menu and select the track labeled Audio Description, Descriptive Audio, or AD.
Balancing Narration and Program Audio
Select television models allow users to adjust the volume mix between the descriptive narrator and original program audio. Therefore, increase the narrator’s volume slightly without drowning out dialogue or crucial sound effects. Additionally, paired Bluetooth headphones or hearing-assistive devices help isolate narration. Before purchasing new audio gear, verify that your TV supports Bluetooth audio, direct headphone output, optical connections, HDMI arc equipment, or hearing-loop accessories.
4. How to Use High Contrast and Magnification Options
High-contrast modes make system menus easier to navigate by increasing the visual separation between text, icons, borders, and background elements. Consequently, these settings assist individuals with low vision, color-vision deficiencies, or difficulty reading faint interface graphics. For instance, Samsung designs its high-contrast mode with a solid black background and high-visibility white or yellow text.
Enabling High Contrast
- Open Settings.
- Select Accessibility.
- Locate High Contrast, Contrast Enhancement, Menu Contrast, or Visibility Enhancement.
- Toggle the setting on.
- Review the interface and choose the clearest visual style.
Although some televisions offer a single high-contrast setting, others permit custom color combinations for backgrounds and text. While bright text on a dark background works best for most users, room lighting and personal comfort dictate the ideal selection.
Increasing Menu Size
Locate menu scaling features labeled Enlarge, Magnification, Zoom Menu, Large Text, Text Size, or Screen Magnifier. Because screen magnification scales menus, program guides, and settings lists, it simplifies reading. However, full-screen zoom also scales the underlying video feed, which reduces total visible screen content. Thus, if zoomed navigation becomes disorienting, use magnification exclusively during setup or select a static large-text setting instead. For example, Samsung offers a Zoom Menu Text toggle, whereas competitor brands utilize different labels for screen-scaling tools.
Improving Focus Visibility
A focus indicator highlights active menu items as you navigate the screen. Therefore, select a system theme that adds heavy borders, bright outlines, or scale animations to the selected element. In comparison, subtle color shifts prove difficult to spot for users with visual impairments. Ultimately, accessible user interfaces do not rely on color alone to indicate focus; they mark active items through high-contrast borders, size changes, distinct shapes, or underlines.
5. How to Simplify Remote Control and Navigation Use
Motor impairments make handling small remote buttons, performing rapid double-presses, or holding precise optical aiming difficult. As a result, comprehensive Smart TV accessibility features extend beyond audio and video into physical control hardware and navigation design.
Recommended Adjustments
- Control core features via built-in voice commands.
- Switch to an aftermarket remote featuring large, well-separated buttons.
- Add tactile bump dots to primary remote buttons for quick touch identification.
- Replace complex remotes with simplified universal control devices.
- Install a mobile remote application if smartphone touchscreens prove easier to operate.
- Reposition the television or IR receiver so remote commands do not require precise line-of-sight aiming.
- Connect external switch hardware or assistive equipment on supported platforms.
Furthermore, built-in voice assistants help users launch apps, switch channels, adjust master volume, search media libraries, and manage playback. Because voice command syntax varies by operating system, consult your TV’s manual for specific control phrases. Similarly, clean up your home screen layout to reduce navigation steps. To achieve this, pin primary streaming applications to the main app bar and create custom favorites lists. In fact, the U.S. Federal Communications Commission mandates that manufacturers make core TV operations accessible—including power, volume, channel selection, guide navigation, system setup, caption toggles, audio-description tracks, playback controls, and input selection.
6. How to Combine Features for Different Impairment Needs
Combine complementary options to build an effective viewing setup tailored to specific user requirements.
| Impairment Type | Recommended Feature Combination |
| Visual Impairments | Screen readers, Audio description, High-contrast themes, Enlarge/Large text options, High-visibility focus indicators, Voice navigation, Tactile remotes |
| Hearing Impairments | Closed captions, Custom text/background styling, Visual volume indicators, On-screen notification lights, Bluetooth hearing equipment, Audio balance controls |
| Motor Impairments | Voice assistants, Simplified remotes, Large-button remotes, Clean home-screen layouts, External accessibility switches, Hands-free smart-home integration |
However, avoid assuming that a single preset configuration fits every individual. Instead, consult the viewer about specific navigation barriers, then enable and test settings individually. After all, automated menu speech empowers one user while irritating another.
7. How to Test and Verify Your Viewing Setup
After configuring essential Smart TV accessibility features, test system performance across real-world tasks rather than remaining in the settings menu. Specifically, open the electronic program guide, launch a third-party streaming application, start a movie, switch inputs, change volume levels, and return to the home screen.
Testing Checklist
- Can the viewer clearly identify active menu selections?
- Does the screen reader speak useful context in a logical sequence?
- Do captions display at a comfortable size with strong contrast?
- Does the audio description track play seamlessly during media playback?
- Can the user manipulate the remote without physical strain?
- Can the user locate primary applications on the home screen quickly?
- Does the television retain all accessibility configurations after a full power cycle?
- Do settings apply across broadcast, cable, and streaming inputs?
In addition, the FCC requires TV manufacturers to make built-in TV functions audibly accessible to blind and low-vision users, encompassing initial setup, media playback, captioning controls, audio-description selection, and input switching. If a feature fails during testing, isolate which hardware or software layer controls it. For instance, the television operating system handles menu narration, whereas streaming applications manage native captions and audio tracks, and cable set-top boxes maintain independent accessibility menus.
Common Problems and Troubleshooting Solutions
- Problem: The screen reader speaks continuously and will not stop.
- Solution: Open the Accessibility menu and switch off Voice Guide, TalkBack, Audio Guidance, or Screen Reader. Alternatively, press the dedicated accessibility shortcut button on your remote control to toggle the feature off.
- Problem: You enabled captions in system settings, but text does not appear during video playback.
- Solution: Open the active streaming app’s playback overlay, verify that the media supports closed captions, and select the correct language track directly within the app menu.
- Problem: You activated audio description, but you hear no narrator voice.
- Solution: Confirm that the source media contains an audio-description track. Next, open the app’s audio track selection menu and manually select the track labeled Audio Description, Descriptive Audio, or AD.
- Problem: System menus remain difficult to read despite enabling adjustments.
- Solution: Increase font scaling, enable High Contrast mode, turn up screen brightness, eliminate room lighting reflections, or reduce viewing distance to the screen.
- Problem: Hand strain or motor fatigue makes the remote control difficult to operate.
- Solution: Use native voice control, program a simplified universal remote, install a smartphone remote application, or connect an assistive switch control device.
Frequently Asked Questions
What are Smart TV accessibility features?
Smart TV accessibility features represent built-in software and hardware options that help viewers with disabilities operate televisions easily. Specifically, these tools include screen readers, voice guidance, closed captions, audio descriptions, high-contrast themes, screen magnification, voice search, and alternative input controllers.
Do all Smart TVs offer identical accessibility options?
No. Software capabilities vary according to manufacturer, operating system, hardware tier, region, and installed software build. For example, Samsung labels its screen reader Voice Guide, Google TV uses TalkBack, and Roku calls its tool Screen Reader or Audio Guide.
Can I enable captions globally for every application at once?
System-level caption toggles apply to native menus and broadcast TV, but third-party applications often override global settings. Therefore, if captions fail to display inside a specific app, open that app’s internal playback menu to enable subtitles manually.
Does every movie and TV show include an audio-description track?
No. Production studios, networks, and streaming services must produce and supply audio-description tracks separately. While televisions can play these tracks, the operating system cannot synthesize live narration for source media that lacks a descriptive audio option.
Does High Contrast mode distort movie picture quality?
No. High-contrast settings modify system menus, settings lists, and interface guides without altering media picture quality or video playback colors. However, full-screen zoom and picture preset adjustments do alter active video feeds.
Can individuals with motor impairments control Smart TVs without holding a physical remote?
Yes. Many modern televisions support hands-free voice commands, mobile touchscreen applications, smart-home automation systems, or third-party assistive switch devices. Always verify hardware compatibility before purchasing external control gear.
Which Smart TV accessibility features should a user try first?
Begin with the feature that targets your primary viewing barrier. For instance, turn on closed captions for speech comprehension issues, enable a screen reader or high contrast for menu visibility difficulties, or select audio description for visual content tracking.
How can family members prevent accidental resets of customized accessibility settings?
Write down simple instructions covering primary remote shortcuts. Additionally, create dedicated user profiles if your television platform supports them. Otherwise, document configured settings so family members can restore preferred options quickly if settings change.
Reference Section
- Federal Communications Commission (FCC): Accessible TV and Set-Top Box Controls, Menus and Program Guides
- Google Support: Make Android TV and Google TV More Accessible
- Samsung Electronics Support: How to Use Accessibility Features on a Samsung Smart TV
- Samsung Newsroom: Get to Know Accessibility Features for Vision and Hearing on Samsung TVs
- Samsung Developer Portal: Designing Accessibility for Smart TV Applications
- Royal National Institute of Blind People (RNIB): Accessible Televisions and Media Guide
- World Wide Web Consortium (W3C): Adaptive User Interfaces for Accessible Hybrid TV
- Android Police: 7 Smart TV Accessibility Settings That Make Watching Easier
Treat Smart TV accessibility features as standard components of the everyday viewing experience rather than hidden tools reserved for troubleshooting. Ultimately, by combining spoken guidance, clear captions, descriptive narration, high-contrast menus, and flexible remote options, a modern Smart TV provides a comfortable, independent, and accessible entertainment hub for all viewers.